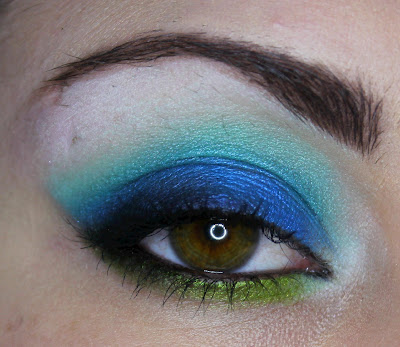
Thursday, March 7, 2013

This Week's Nails #18 - Essence St. Patrick's Day Shatter Nails

Hey guys!

Sorry I've been AWOL again, I've been busy working on some projects. I've been getting some more time for print and unpaid work and I'm so happy! They've been loads of fun and I'm meeting lots of new people and gaining tons of experience.

I've done my nails three times this week. I got some stamping plates, so I've been messing with those. They're a bit tricky to use but I'll keep it up and be pro in no time :D I didn't photograph those manicures, they were cool to me because they were stamped but they were pitifully done!
My latest manicure is another shatter one, I can't get enough of them. I was in town recently and saw the Essence 'Oz the Great and Powerful' collection. There are five shatter colours in it! I got them all..They cost about €12 total and they're really awesome so it was well worth it! I'll do another post soon with swatches from them all so you can have a look.

I've seen some St. Patrick's Day manicure's around. Some of them are pretty cool, but most just don't appeal to me! Paddy's day isn't a big deal to me despite living in Ireland, so while I like the colour theme I'm not so fond of the leprechauns, pots of gold and flag colours. I wanted to do a themed manicure for this holiday but a more understated one, so I topped Essence's 'Walk on the Wild Side' with their 'Master of Illusion' shatter topcoat. I love the result!


'Master of Illusion' is a pretty colour. I'd call it jade green, but I've seen others call it aqua or turquoise. It is a little on the blue toned side. 'Walk on the Wild Side' is a deep green with grass green shimmer. The shimmer isn't that visible in this manicure though. Here's what I used, see you soon!

Products used:

Sally Hansen Double Duty Base/Topcoat
Essence - Walk on the Wild Side, Master of Illusion
Seche Vite Dry Fast Topcoat

Thursday, February 28, 2013

Sci-Fi Makeup

Hey!

I'm doing makeup for a remake of a French movie, 'La Jetée'. It's a short film and I believe it will be screened at a local film festival. It's shot using stills which is really interesting. We're shooting tomorrow, so I've spent the last few days doing test runs of looks I wanted to use. There are some people from the future in it, so I get to do fun stuff! This is the one I did today:


I don't know yet if this one will be used at all, but I came up with a few different ideas and tried a lot of stuff out. I did some searching online for inspiration, and I came across a Youtube channel called BeautyARTStudio. This video in particular inspired this look - http://www.youtube.com/watch?v=WvlKnf4hCVc, This lady's looks are really cool. I'm not sure how to describe them, they look like high fashion looks. She uses a great technique for making shapes. It's a lot like when you define for a cut crease look, you drag the kohl and smudge it out. She uses eyeliner brushes for this and it makes the pencil easy to manipulate. You need a soft, smudgy pencil for this. I used Urban Decay Glide-On Pencil in Zero, it was great. I tried my Collection 2000 black kohl too but that didn't move as well as Zero. I used Sigma's E05 and E11. Here are some more pics:


I have some embellishments to add to this look when I do it for real tomorrow. I got some rhinestones and metal bits for decorating cards so I'll stick them on and try to make it really cool. I'll be contouring too and perhaps slightly altering the skin tone. I'm not sure what to do with the lips. I tried black and silver but I had to crop my mouth out of the photos because it looked super bad D: ! I was pretty stuck for time today, and I had to meet my sister not long after completing this. I had to make it 'wearable' because I didn't have time to redo my makeup :( This is the best i could do!


Sorry about my eyebrows again, oh god. I need to see someone about that. I took off some of the makeup around the eye and sort of made a cut crease. Hooray! My sister said it was nice so I guess it wasn't too bad. Here are some more pics and a product list, maybe some of you are feeling adventurous. I hope you enjoyed this slightly different look. See you soon! :D


Products used:

Face:

Maybelline BB Cream - Light

Soap & Glory Kick-Ass Concealer - Light
Maybelline Fit Me Powder - 120

Eyes:

Too Faced Shadow Insurance
Urban Decay Glide-On Pencil - Zero (great pencil for this dragging technique!)
Urban Decay Shadow - Verve, Blackout
Sugarpill - Tako

The Body Needs - Iced Diamonds
Maybelline Falsies Mascara
Essence Eyebrow Designer - Brown

Lenses:

EOS Ice Violet

Sunday, February 24, 2013

Another Face #5 - Niamh

Hey!

I did more practice makeup last night, this time on my friend Niamh :) I did a full face of makeup again with contouring. She wanted something sort of natural which is just as well because I think I'm done with my colourful phase for now! I'd never worked on Niamh before, but she was lovely to work on. She has evenly spaced eyes that are a little on the small side, small/standard eyes. I wanted to try a couple of eye enlarging techniques I saw recently. Curling the lashes and smudging kohl liner on the upper lash line to define and extend the eye, as well as placing more mascara on the outer lashes to open the eyes up more. I didn't use nude liner though, I didn't want it to seem too much like a daytime look.

This was sort of a test run for makeup I'm doing for Jordan today. She's going to a fancy ball and is looking for a nude look. Super sophisticated! I did up a nude cut crease already and I'll show her this one too. I want to use taupe shadow on Jordan to make her blue eyes stand out, so I tried this on Niamh too.

I didn't take before shots again because I forgot. Here are the after shots.


Amazing lower lashes!! :O

I'll be working on Niamh more in the future, hopefully often enough! Here's a product list, I'm off to do more makeup. Busy busy!  See you soon >_^

Products used:


Face:

Revlon Photoready Primer

Stargazer White Foundation (Highlight)
L'Oreal True Match Liquid Foundation - Golden Amber (Contour)
Revlon Colorstay Liquid Foundation - Ivory
Soap & Glory Kick-Ass Concealer - Light
Natural Collection Loose Powder - Neutral Translucent
NYX Blush - Silky Rose

Eyes:

Too Faced Shadow Insurance
Urban Decay - Buck, Foxy
NYX - Taupe Pearl, Deep Bronze
The Body Needs - Iced Copper

Urban Decay Glide-On Pencil - Zero
Maybelline Falsies Mascara
Essence Eyebrow Designer - Light Brown

Lips:

Rimmel Apocalips - Nova

Saturday, February 23, 2013

Another Face #4 - Jordan

Hi! :D

I did makeup on my buddy Jordan today, she was feeling colourful so I did a look using Sugarpill. I did contouring and stuff too, it was a practice session. Look how pretty!


I don't have a before shot, but I'll try to get one another time. I used liquid liner on her, normally I use gel liner on other people because it's easier to control. I think I'll stick with the gel liner for now, although I do want to become more proficient with liquid liner too. Doing it on myself is a lot easier, but then again all makeup application is easier on yourself! I think I'm doing more makeup tomorrow for someone and again Sunday for Jordan. She's going to a ball so she has to get fancy. I want to do something super sophisticated, I'll have to have a think. I'll look into some celebrity looks, red carpet stuff.

I have a film shoot coming up too that I have to prepare for. It's sci-fi so I have to come up with some pretty out there stuff. I have ideas though and I picked up some bits today to mess with. I also have an assignment that will be put off until last minute. I'm so busy lately! I quite badly need to find time to do my nails. Anyway, here's a product list for this look, see you soon!

Products used:


Face:

Revlon Photoready Primer
Stargazer White Foundation (Highlight)
L'Oreal True Match Foundation - Golden Amber (Contour)
Revlon Colorstay Foundation - Ivory
Soap & Glory Kick Ass Concealer - Light
Natural Collection Loose Powder - Translucent Neutral
NYX Blush - Silky Rose

Eyes:

Too Faced Shadow Insurance
NYX White Base
Sugarpill - Mochi, Buttercupcake, Acidberry, 2am, Tako
No7 Stay Perfect Liquid Liner - Black
Urban Decay Glide-On Pencil - Zero
Maybelline Falsies MascaraEssence Eyebrow Designer - Brown

Lips:
Essence Marble Mania Lip Gloss - Peach and Mix

Friday, February 22, 2013

Neo Sunflower Aqua Lens Review

Hey!

I love coloured contacts, and I have a good few pairs but I don't wear them often enough. I buy yearly disposable ones so they last a long time, but I think I should start using them a lot more than I do. Today I'm reviewing Neo Sunflower Aqua. I've had them for a while but only worn them a handful of times. This is what they look like on me.


I got them on honeycolor.com for $24. They are 14.2mm diameter so they're only slightly enlarging. They look nice though, I really like how they look in my eyes. They look a little more natural in dimmer lights when my pupils are more dilated. They don't look unnatural in size but this aqua shade is quite bright. I think these lenses in other colours could look quite natural, I'll have to get some more and find out :D

They're yearly disposable and came with a free case. They're quite comfortable! I wear them for long periods of time without needing to remove them. They dry out, but not too often. I use a dry eyes mist to help with that so it's not much of a problem. These lenses are also available in green, blue, violet, grey, brown and hazel! Check them all out here. I'll leave you with a product list in case any of you were wondering about the makeup! See you soon, expect more lens reviews :)

Products used:


Too Faced Shadow Insurance
NYX White Base
Sugarpill - 2am, Dollipop, Tako
The Body Needs - Play Thing
Urban Decay Glide-On Pencil - Zero
Maybelline Falsies Mascara
Essence Eyebrow Designer - Brown

Lenses:

Neo Sunflower Aqua

Lashes:

Cheap ebay lashes :O

Tuesday, February 19, 2013

This Week's Nails #17 - Delirio Rosa

Hey!

Nails again. Holographic polish, I think it's incredibly cool. What do you reckon? I picked up this pink holo polish by Jade on Llarowe last week and I love it! The only down side is the super strong smell. Luckily it goes away once it dries but god damn it was potent. Worth it though! I think the name's pretty cool too. I made a pendant with this, looks really nice :) It'll be up on my etsy shop after I get it photographed, along with a good few more. Check out some shots of this awesome polish!


Shot with ring light


Shot in natural light


Shot in natural light

Products used:

Sally Hansen Double Duty Base/Top Coat
Jade - Delirio Rosa
Seche Vite Dry Fast Top Coat

Monday, February 18, 2013

MUA Glitterball Palette Review, Swatches and Look (with Sugarpill too!)

Hey!

Here's the review I threatened you with! I made an order from MUA a couple of weeks ago. Among the items I purchased, I got the Glitterball palette. It was only £4! Definitely check out the site here, your money goes so far it's actually hard to believe. Let's take a look at Glitterball!


Stop giving us these crappy sponge shadow brushes, nobody wants them >:(


For your £4, you get twelve soft, shimmery, well pigmented shadows. After swatching them, I couldn't believe how cheap they are, check it out.


You have to build them up a bit and you would definitely need a primer, but look at them! From these swatches you could easily mistake them for a high end brand. Some of the shades in this palette remind me of some Urban Decay shadows! The quality isn't high end, but it's very good especially considering the price. They perform incredibly well. These shadows apply nicely, they're very buildable and blend easily too. I didn't have much problem with fallout either. There was some, but not a great deal. Here's the look I came up with.


I'm not done with my colourful phase, but definitely excited to use some shimmer for the first time in a little while! I paired a couple of Glitterball's lovely shimmery shades with some matte Sugarpill shadows to create this look. I went light on the liner and kept it looking pretty soft. I filled in my super scruffy brows with shadow instead of pencil so as to not overpower the rest of the eye makeup. I am super impressed with this palette. What you get for your money is unreal, I can't wait until my new spending ban is lifted and I can get some more of their stuff. Here's one more photo and a product list, see you soon!


Products used:

Too Faced Shadow Insurance
Fyrinnae Pixie Epoxy
Sugarpill - Mochi, Tako
Essence Kajal Pencil - Tu-Tu-Turquoise
Rimmel Scandal Eyes Kohl - Nude
Maybelline Falsies Mascara
Catrice Gel Liner - It's Mambo No. 2
MUA Glitterball shadows used:


Sunday, February 17, 2013

Sugarpill Blue & Green

Hey!

Another colourful eye look, blue and green this time. I'm crazy about Sugarpill lately! I'd love to get my hands on some more of their loose shadows too, I only have Goldilux but it's fab. I wore this look out to a party at a friends house last night. I paired it with clear gloss and Bourjois Blush Pot in Rose d'Or, keeping it toned down to show off the eyes. I can't find my eyelash glue but I wanted to wear false lashes too. I really need to practice applying them. Here are some photos and a product list! I'll post again soon with a product review or something hopefully for a change.


Products used:

Too Faced Shadow Insurance
NYX White Base
Sugarpill - Afterparty, Mochi, Acidberry, Tako
MUA matte eyeshadow shade 20 (black)
Urban Decay Glide-On Pencil - Zero
Maybelline Falsies Mascara
Essence Eyebrow Designer - Brown

Saturday, February 16, 2013

This Week's Nails #16 - Turquoise and Pink Glitter Shatter

Hey! Since I got OPI Black Shatter, I also invested in the turquoise and white versions :O
They'll be useful for making pendants as well as being super awesome on my nails! I'm still obsessed with the Nubar Sparkles polishes I got and I wanted to use another one asap. I thought I might as well combine my two latest polish favourites and see how it goes. 
Also, I  wanted to make the most ultra-colourful shatter manicure possible. I think the result looks really cool!


Products used:

Sally Hansen Double Duty Strengthening Base/Top Coat
Nubar Petunia Sparkles
OPI Turquoise Shatter
Seche Vite Dry Fast Top Coat

Sugarpill Green & Purple

I suddenly got colourful today. I got a sweet new Totoro t-shirt and it's green and purple, so I did some makeup to sort of coordinate with it. Ta-dah!


My eyebrows D: Eyebrow maintenance is the biggest pain. Purple brows might be cool with this look actually. I think coloured brows look odd on me though so it doesn't often occur to me to try it. Ooh, I got the Sigma Precision Eye Kit this week and it is so badass. The brushes are amazing, especially the crease brush and the blending brush. I'll review it at some point but I want to use them more first. So far I love them anyway! Here's another photo and a product list.


Products used:

Too Faced Shadow Insurance
NYX White Base
Sugarpill - Midori, Acidberry, Buttercupcake, Tako, Dollipop, 2am
Urban Decay Glide On Pencil - Zero
Maybelline Falsies Mascara
Essence Eyebrow Designer

Wednesday, February 13, 2013

Blue Smoky Eye

I haven't done makeup on myself in a few days! I wanted to try something that I'd seen around recently, this dark blue smoky eye look. I'm a big fan of Gossmakeupartist on Youtube and yesterday I watched one of his videos on complimentary eyeshadow colours. A dark blue shade was on the list for brown eyes, and that reminded me about this look! I didn't work from a tutorial or anything, I just sort of winged it with a basic smoky eye method. I hope you like, see you soon!


Products used:

Too Faced Shadow Insurance
NXY White Eyeshadow Base
Sugarpill - Afterparty, Velocity, Tako
Urban Decay Naked 2 Palette - Foxy, Bootycall
Urban Decay Glide On Pencil - Zero
MUA Shade 20 Matte
Benefit They're Real Mascara
Essence Eyebrow Designer - Brown

Nail Art #5 - V-Day

Hey!

I've been crazy busy lately! I did makeup for a photo shoot on Sunday, it was an all day thing and I've been shattered ever since! It was a time for print job, I'm trying to get my portfolio started. I think it went well and I can't wait to see the shots when they're done, I'll definitely post some here for you all to see :)

I got some (more) new polish in the post this week :D I ordered some Nubar in Fire Sparkles, Petunia Sparkles and Violet Sparkles. They're gorgeous glitter polishes. I got them for about €8 on Beauty Bay. I also got the Seche Vite Dry Fast Top Coat for about €11. It's amazing :O It dries insanely fast, and gives the most beautiful shine. It gives incredible dimension to glitter polishes too. I really really needed to find this top coat. Doing my nails takes me way too long because nothing dries fast, it's a pain. I end up sat there with my hands in the freezer for ten minutes. If you're into nails and you don't have this, you need it. Trust me.
Seeing as Valentine's Day is coming I thought I'd attempt some V-Day themed nail art. I did a crap job but I tried! I hate tiny rhinestones :/ They're so fiddly! Here's what I managed anyway:

Crude Rhinestone Heart
Products used:

Sally Hansen Doubly Duty
Nubar Fire Sparkles
Seche Vite Dry Fast Top Coat
Black rhinestones from ebay

Friday, February 8, 2013

FOTD #7

Hey! I'm doing some photo shoots soon to get professional shots to start my portfolio, so I've been trying to come up with looks to use. I did this yesterday, contouring and everything! You know how rarely I post FOTD shots, never mind how rarely I post contoured ones. There's an eye closeup at the end too. Tell me what you think, I'd love some feedback! 


Products used:

Face:

Revlon Photoready Perfecting Primer
Revlon Colorstay - Ivory
Maybelline Fit Me - 120
Soap & Glory Kick-Ass Concealer - Light
Soap & Glory Trick and Treatment Under Eye Dark Circle Concealer - Bright On
Inglot Contour Duo
Maybelline Fit Me Powder - 120
Bourjois Blush - Rose d'Or

Eyes:

Too Faced Shadow Insurance
Urban Decay Naked Palette - Sin, Toasted, Buck
Urban Decay Naked 2 Palette - Chopper, Foxy, Bootycall, Tease, Blackout
Rimmel Scandal Eyes Kohl Pencil - Nude
No7 Stay Perfect Liquid Liner - Black/Brown
Max Factor 2000 Calorie Dramatic Volume Mascara - Black/Brown
Essence Eyebrow Designer - Brown

Lips:

Rimmel Apocalips Lip Lacquer - Nova

Thursday, February 7, 2013

Polish Haul and Black and Yellow Shatter Nails

Hey!

I bought so much nail polish :O Look:


Most of these were half price, and I wouldn't even feel bad if they weren't because I was on a spending ban for all of January and I rocked it :D These are the names from left to right!

Rimmel - Sunshine
Essence Cherry Blossom Girl LE - Fortune Cookie, It's Peach Not Cherry
Essence Vintage District LE - Vintage Peach, Get Arty, Antique Pink
OPI - Black Shatter

Catrice Million Styles Special Effect Topcoat - Shake it! Flake it!, Return of Space Cowboys, Have an Ice Day, Godfather of Pearl, ¿Holo Que Tal?!
Sally Hansen Complete Salon Manicure- Ivory Skull

I got the Catrice topcoats to do some more nail polish pendants with, they're all really cool! Here are some closeups of the bottles:

Sunshine, Fortune Cookie, It's Peach Not Cherry, Vintage Peach, Get Arty, Antique Pink

Shake it! Flake it!, Return of Space Cowboys, Have an Ice Day

Godfather of Pearl, ¿Holo Que Tal?!

Black Shatter, Ivory Skull

I did a manicure using Sunshine and Black Shatter! I'm really happy with how it came out, but the bottle of Sunshine I got is pretty crappy. Applied really streaky and took 3 coats to be opaque. I couldn't have worn it alone, it didn't look good at all and I don't think topcoat would have helped much. I was planning to use Black Shatter anyway, but I would've been cranky if I wanted to wear Sunshine alone. I got a massive chip on my thumb that I expertly concealed in the photo, but I don't think that's Sunshine's fault because all my other nails are still perfect. Have a look, I promise this is the last photo. See you soon!
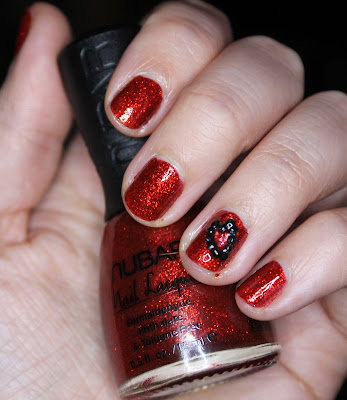


Sunday, February 3, 2013

This Week's Nails #15 - Cotton Candy

Hello! Since I can't wear makeup until I'm better, I did my nails again. I used 'Cotton Candy' by Fearne. It's from a Fearne Cotton nail polish set that I bought after Christmas in the Boots sale. I paid €7.50 for this set, which was half price. This set is called 'Perfectly Polished. There six polishes inside, so this was a really good deal for the price I paid! There are some lovely spring and summer colours in this one. There is a set with darker polishes too, called 'Midnight Manicure'. I got that as a gift for Christmas. I used some of them to make pendants with, but I haven't applied them to my nails yet. They look gorgeous, though.

'Cotton Candy' is a pink lilac creme. The formula is thick and it gives fantastic coverage. I used two coats for this manicure but I could probably have got away with one. My application is a little messy, sorry about that!


Friday, February 1, 2013

Off Topic - Etsy Shop

Just a quick post to let you all know that I opened an Etsy shop! I do crochet and a little jewellery making, and I've decided to try to sell some items. My shop is here: http://www.etsy.com/shop/StuffChicksMade. I just opened it and I have listed eleven pendants for sale. I made them with nail polish! Here are a few photos of some of them, let me know what you think of them: